Modifying Virtual Disk Partitions & Intro to Xen Orchestra
intro#
When I started this blog the idea has been this is a place to not just write about anything but to walk through problems. This post will walk through an issue where I was out of disk space on a virtual hard disk and how to expand it and bring it back online. If you’d rather skip over my story jump to tl;dr.
the problem#
In my home lab I use a self-hosted GitLab instance to automate my infrastructure management. Generally my infrastructure is made up of a handful of bare VMs running docker and host docker compose configurations. vgose, a VM in which hosts my GitLab instance, was no exception. However, I committed a crime in its deployment. Against the well documentation recommendations and best practices I configured the GitLab runner execution on the same VM. But hey this is a home lab, not a production with hundreds to thousands of users, just me. It would be more effort to maintain a whole other runner vm for the few times a pipeline kicks off.
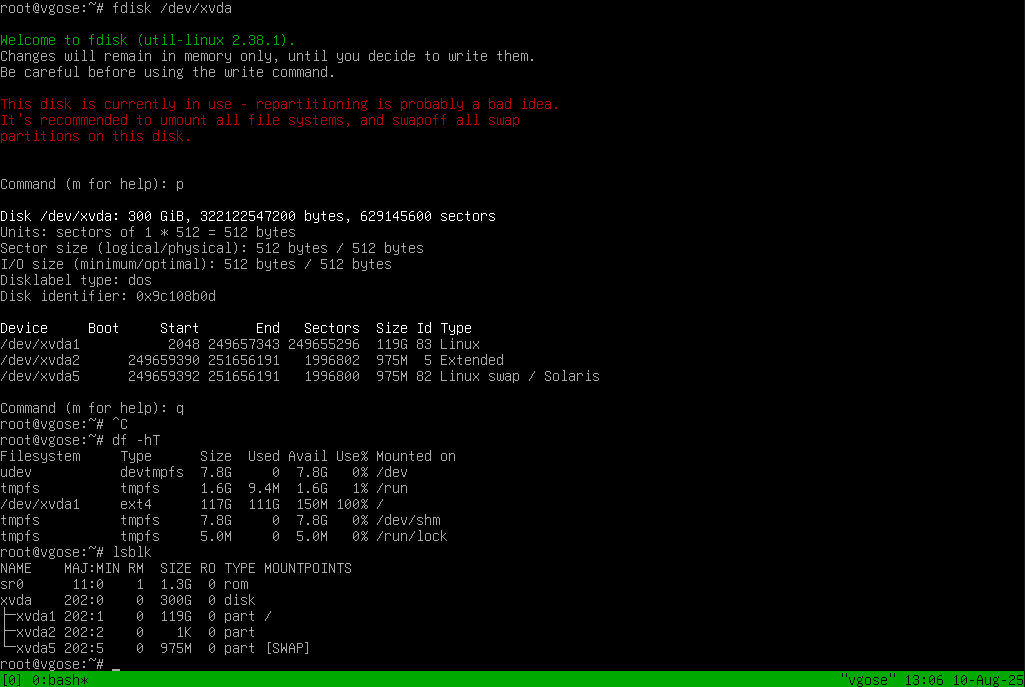
Well, lumping these configurations together led to the GitLab runner service pulling new images for docker and ran my default template 120G drive out of space. So naturally I noticed as runner jobs were beginning to fail without much reason. The easiest way to determine available space is using df -h and you can see the results says root mount / is at 100%. Whomp.
disk free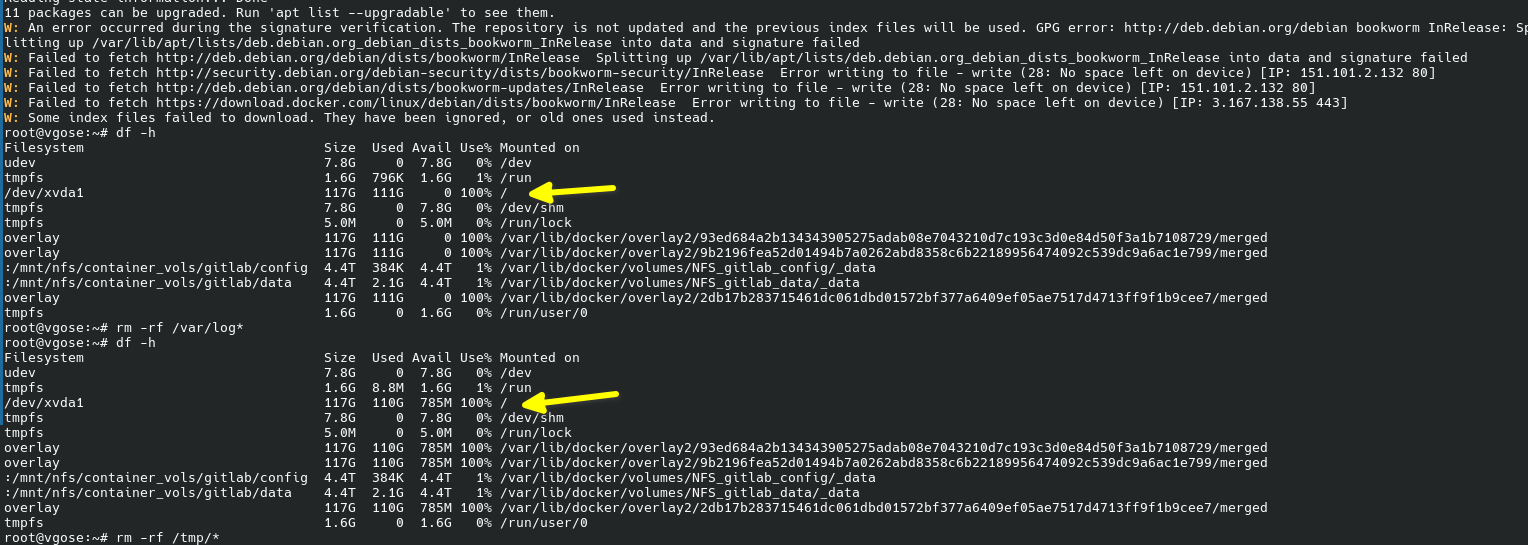
I tried a desperate attempt to clear /tmp and /var/log/ for some wiggle room. But as you can see, it’s the running GitLab container that was taking up the space with its overlay volumes. No problem though, this VM has a special purpose it deserves a little more room.
make it more big#
So the first thing is let’s expand the disk size. Using XOA this part is easy by just changing the number in the disk list for the VM. This however won’t make any more space available without any edits to the disk partition table. A partition table, generally, is a logical method to compartment disks physical sectors.
disk free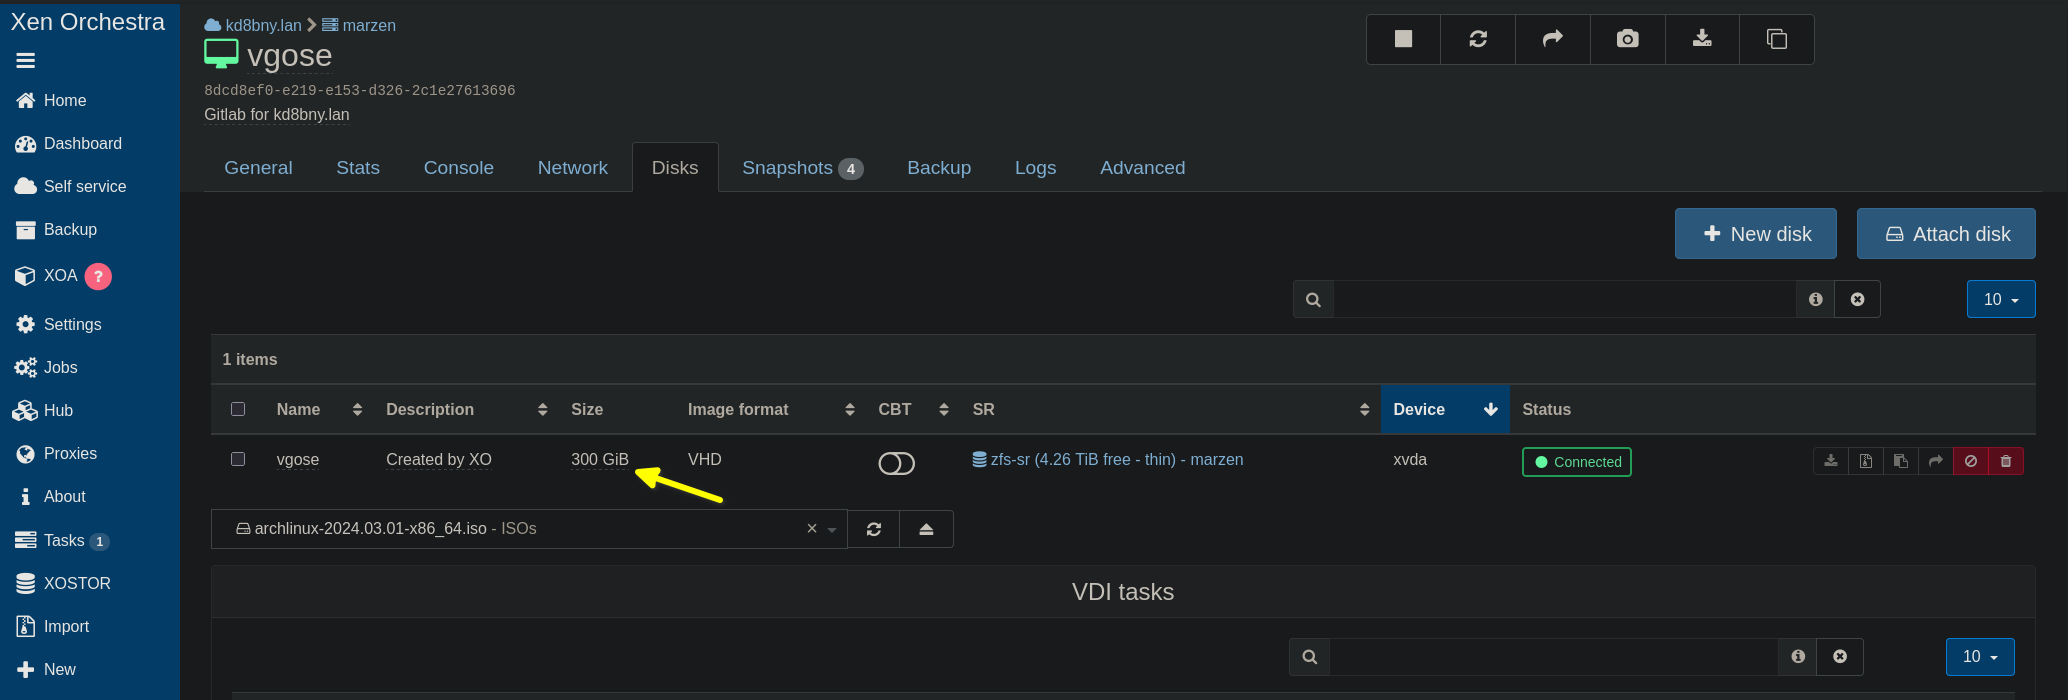
<tangent>#
The partition table is basically an index of start and stop positions aligned to drive sectors which set the bounds of what can be used.
Let’s use some ASCII to visualize.
                    |      mah' data     |
                    |   filesystem 1..n  |
|  partition table  |    partition 1..n  |
|        physical drive sectors          |
So basically, your data lives on the filesystem, the filesystem lives on the partition, and your partition lives on the drive. There are systems that add an abstraction layer between the partition and filesystem like Logical Volume Manager (LVM). LVM is actually really nice and resolves many of the issues I have here… alas my system is not configured as such.
</tangent>
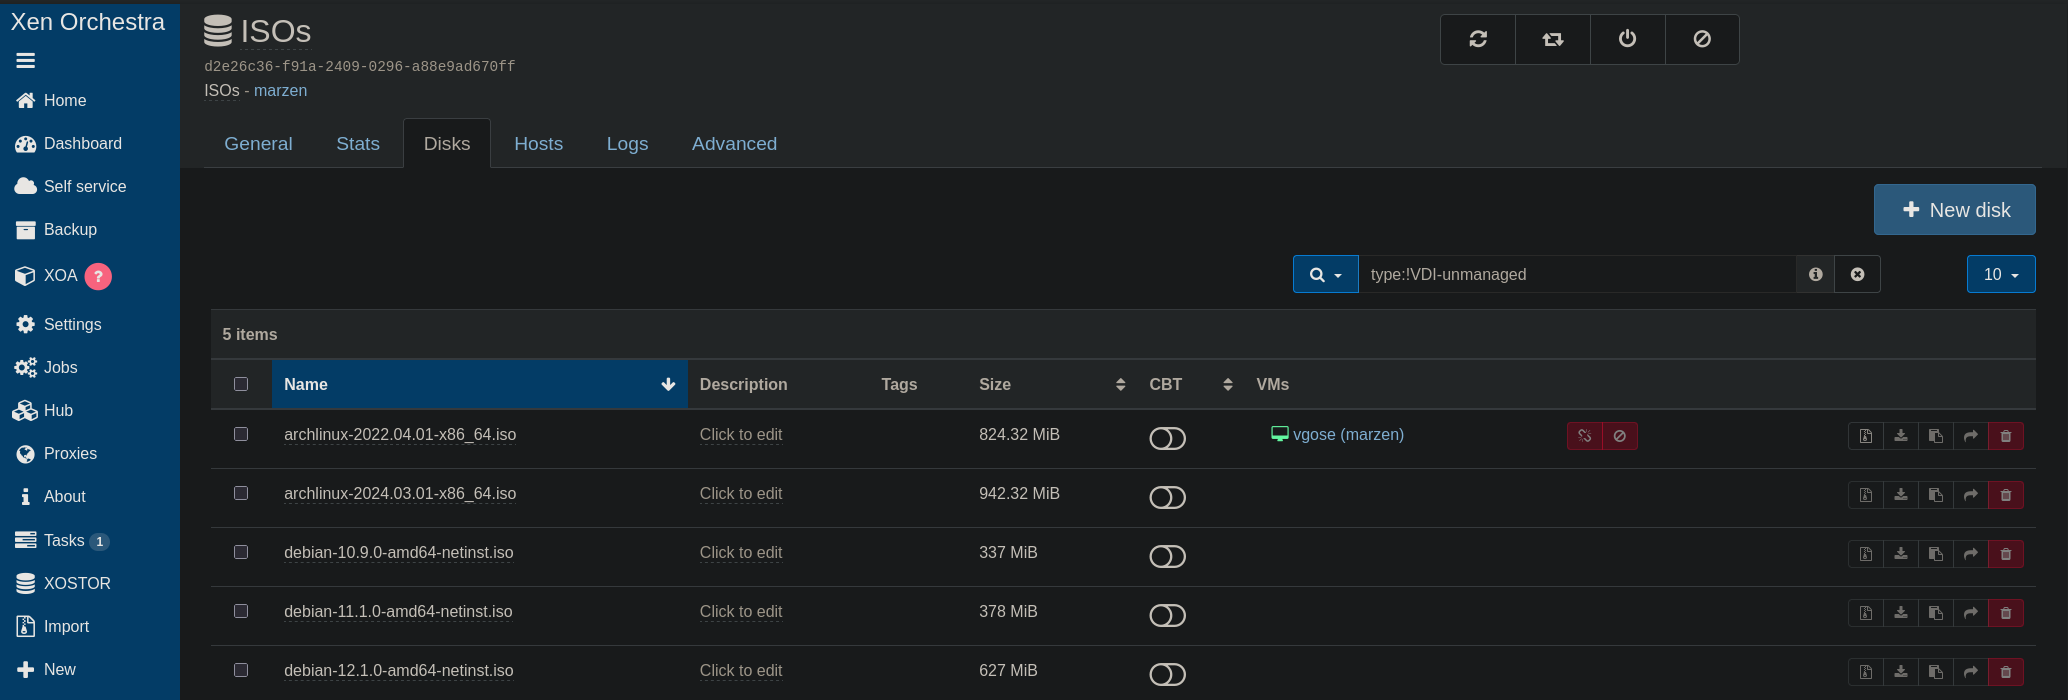
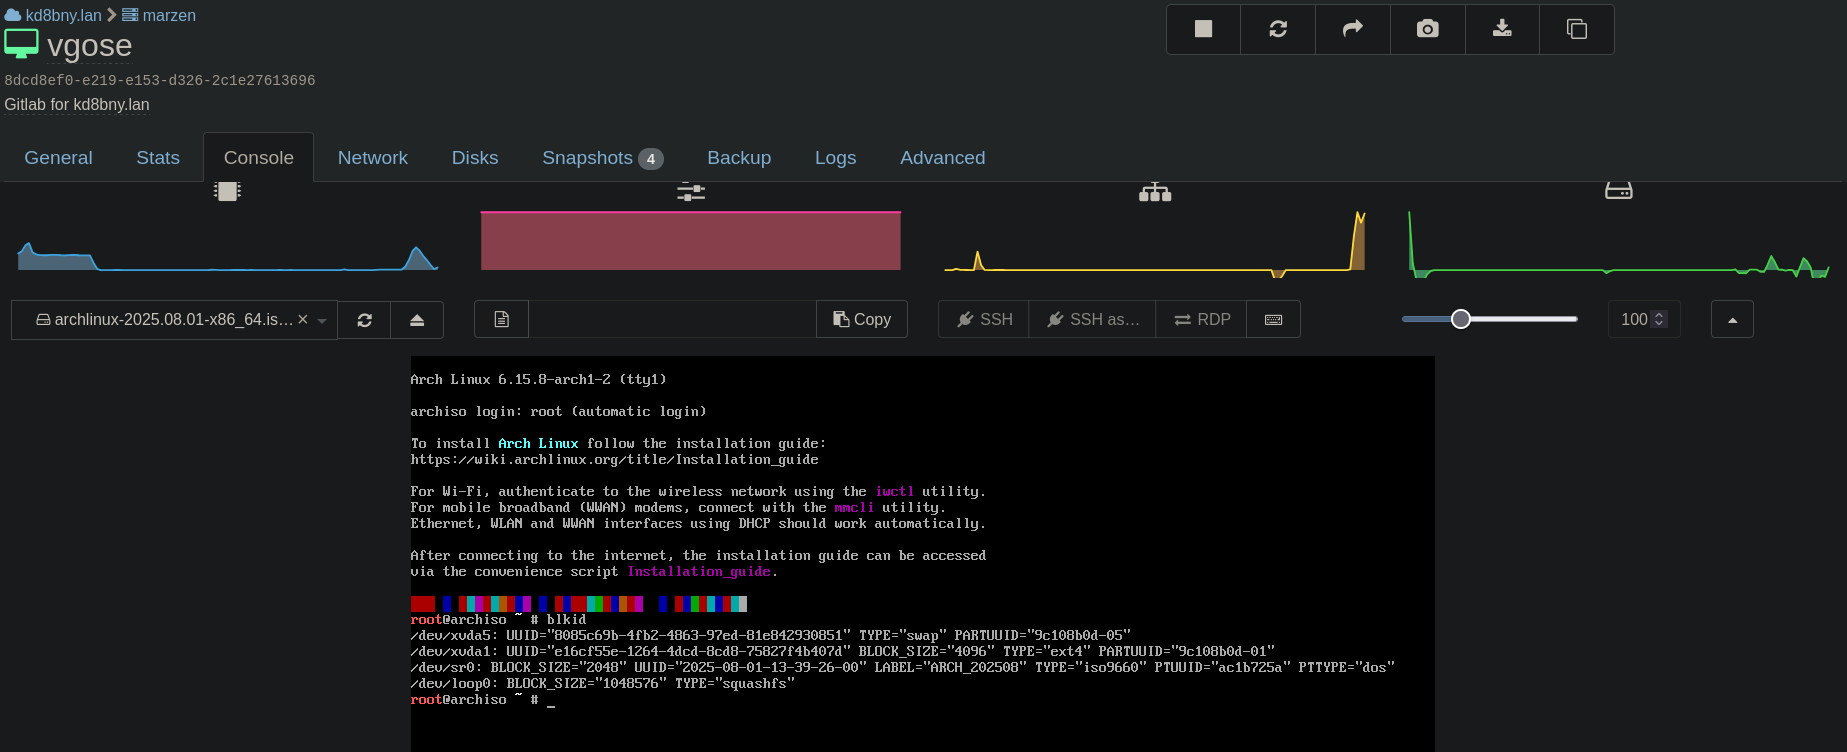
So let’s make some edits to our disk. Since we are going to mess with the partition structure we need to make sure that the disk isn’t mounted. The easiest way to do this is to boot up with your favorite ISO. If available you can choose a recovery mode during bootloader selection. My favorite ISO for most things is the latest monthly build of Arch and I have it handy in my XOA storage repository.
disk free
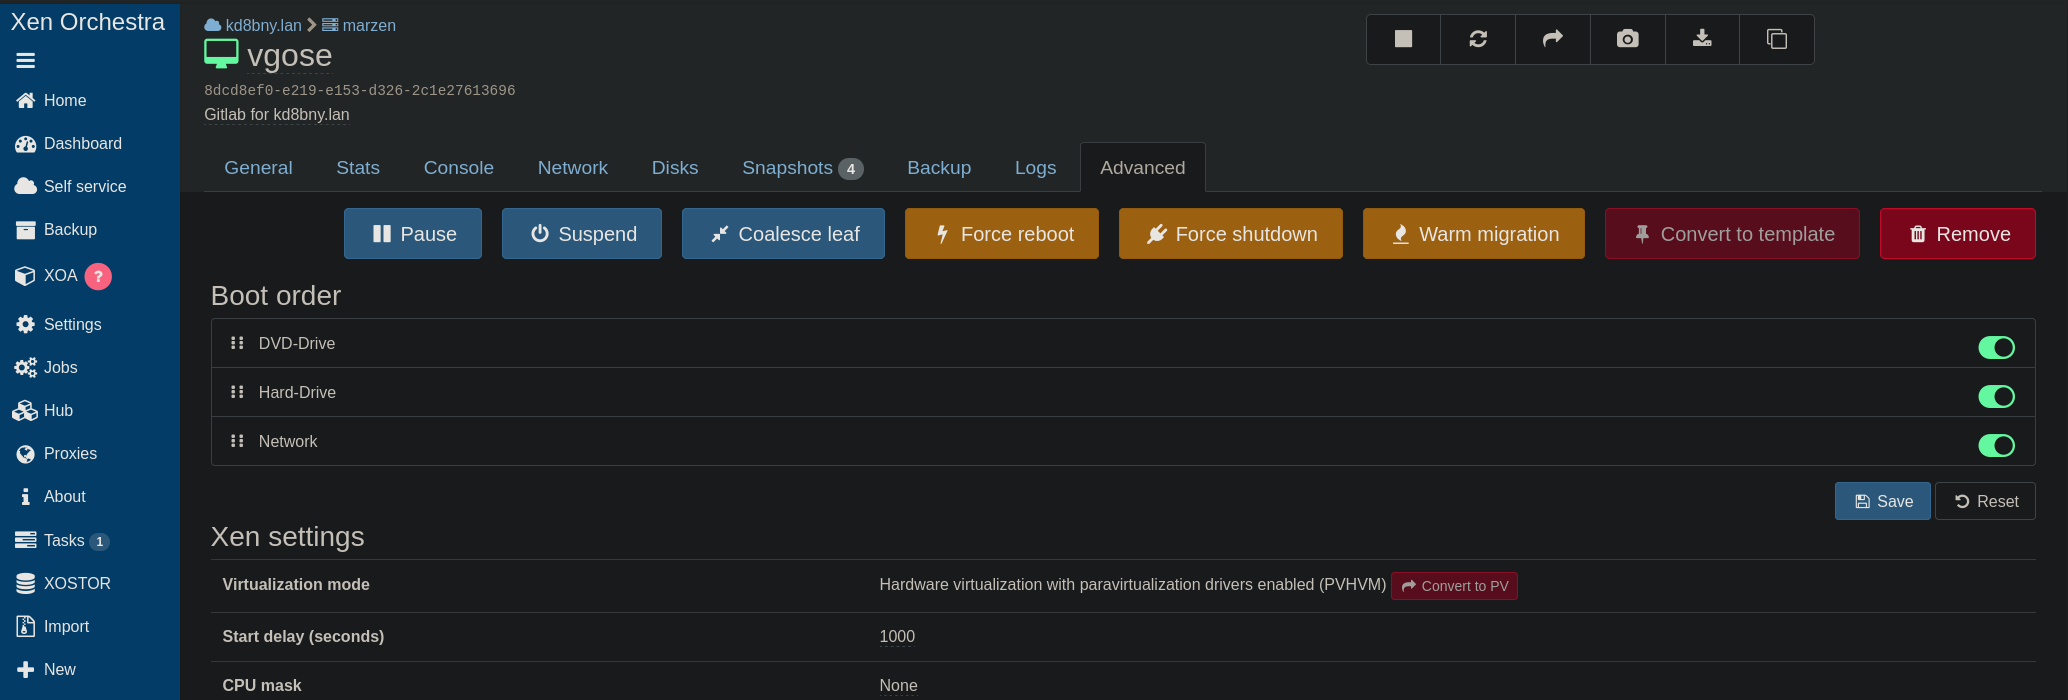
In XOA mounting an ISO is easy on the fly. Under the disk tab choose your image. Don’t forget to change your boot order, which can be completed in the advanced tab.
disk free
Proof we’re booted up, we got bash and Arch is running.
disk free
parted#
Now it’s time to do some damage. Literally. Messing with disk partitions is probably the most risky this you can do.
Make a snapshot. Do not pass go. Really.
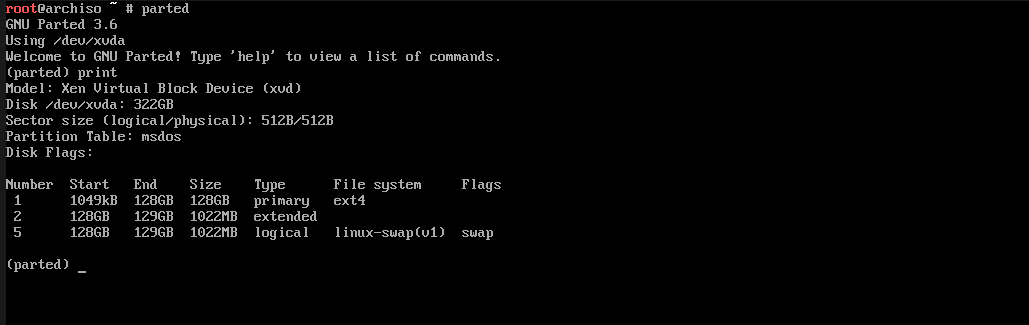
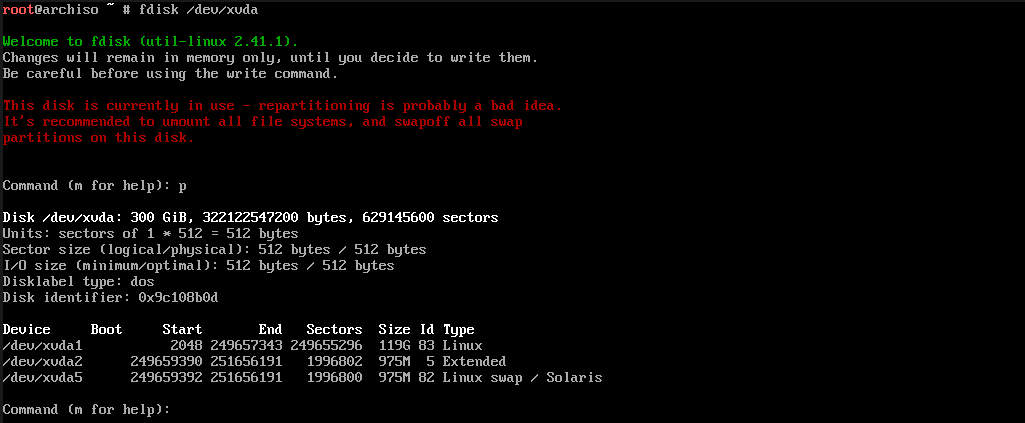
Let’s use parted. fdisk Is also a fan favorite, but I normally head for parted. Once you’re interactive, use help for the various commands available. Use print to see your disks and partitions available.
#parted
(parted) print
In this system we only have 1 disk and 3 partitions. Partition 1 looks like our root and 5 is our swap.
Note: I personally have no idea why the Debian installer configured it this way.
disk free
Well parted offers a resizepart command, let’s give it a shot. Resize the partition 1 to the full size of the available space on the disk.
resizepart 1 100%
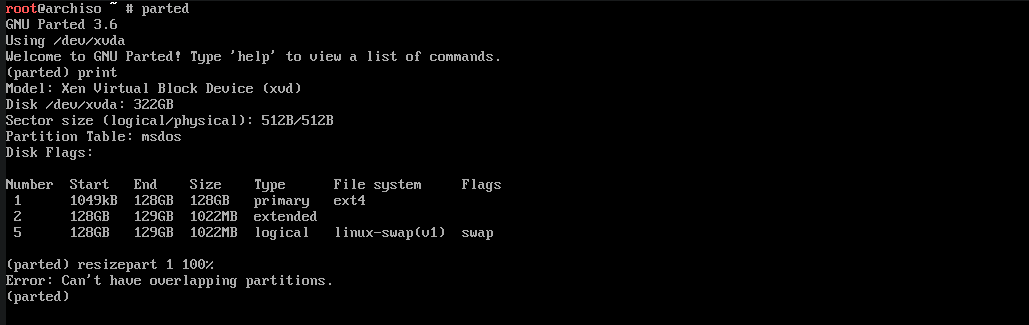
disk free
Huh, well then… Can’t overlap a partition eh?
So basically this is saying parted can’t resize partition 1 to maximize the space because it would overlap partition 2 and 5. It’s not that parted isn’t smart enough to do something like that, it’s not. But it’s more of moving a partition would require moving all the data in the filesystem to new sectors on the drive as your setting a new start and stop point for the moving partitions which is very risky and complex. So we just can’t do that, not here anyway.
Taking a look at the partition table again. Partition 5 is swap with no critical data. Partition 2 looks kinda fishy. It has no filesystem, its extended, and it’s only 1GB in size. Usually a partition in a similar slot could be boot which mounts to /boot, but the flag isn’t set, and it’s far too small. Let’s try to mount it 🤷♂️
$mkdir < temp dir >
#mount </dev/deviceZN> <temp dir>
wth I can’t even mount it.

ope can’t mount
Note: Ignore my type fat mount attempts at the time I thought it was a boot partition till I noticed the size.
investigation#
A’ight, so what options do we have?
- I can make a new disk with more space and copy the data over
- Let’s dig into this partition table and see if we can shift partition 2 and 5 to extend 1.
Going with plan 2 because I’m lazy, its interesting, and I have a recent snapshot of the disk. Let’s go!
Let’s take a look at fstab and blkid to dig in some more. The tmux top pane showing /etc/fstab shows that Debian doesn’t even mount this partition on boot. Furthermore, I. The bottom pane we can see that the bootloader is on partition 1 when we mount it and partition 2 isn’t even listed in blkid.
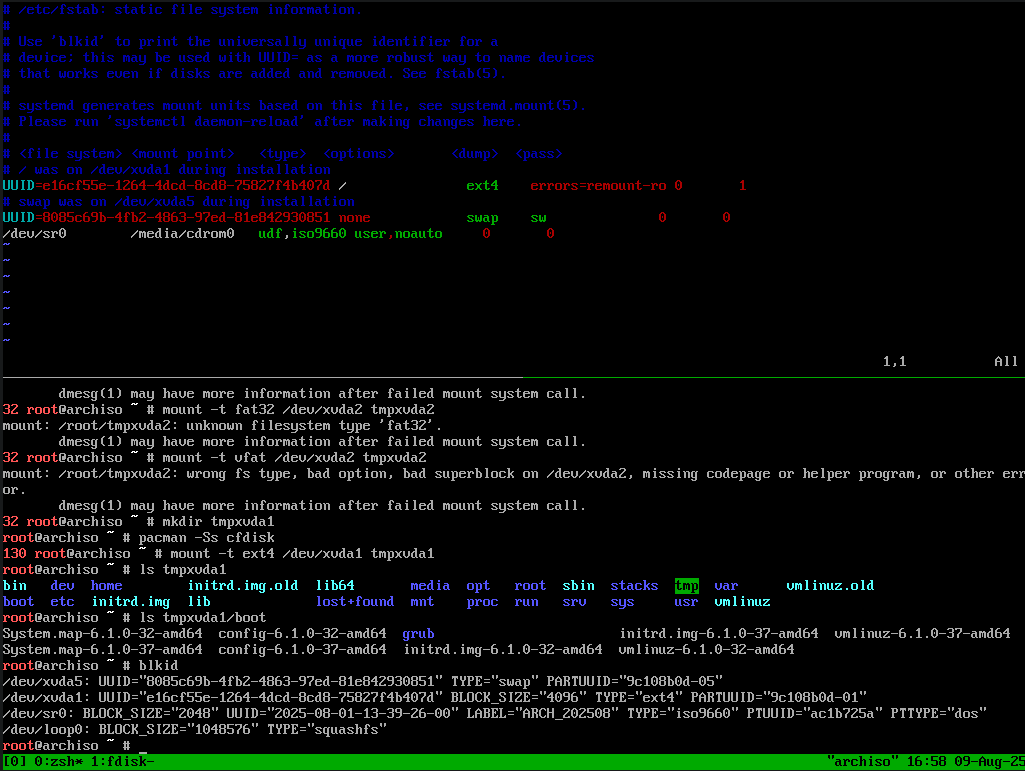
fstab lookaround
Let’s try fdisk to see if any more information is available on partition 2. In which we find nothing more useful.
Determination: I’m 98.89% sure there is nothing on partition 2 worth saving. Let’s delete it and resize the data partition 1.
parted view
parted view 2
start the partitions#
First let’s begin by removing partition 2 and 5 with rm
#parted
(parted) print
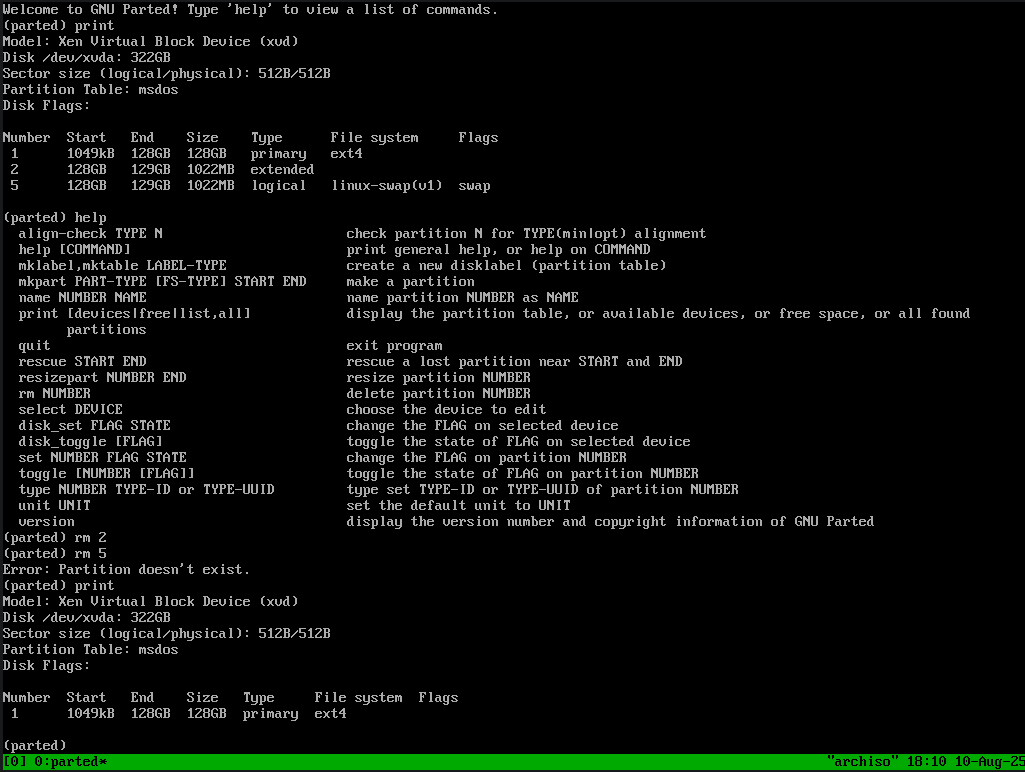
(parted) rm 2
(parted) rm 5
(parted) print
As you can see only partition 1 is left in the table.
part 1 survives
Now we can resize partition 1, successfully this time. However, this time I don’t use 100% as I want to leave space at the end of the disk to create a new swap partition which I’m going to size at 2GB.
(parted) resizepart 1 320GB
(parted) print
As you can see the partition was correctly resized to 320GB.

part resize free
Now let’s create a new swap using mkpart. Issuing mkpart alone will stat a series of prompts. I believe you can enter it all in one line if desired.
mkpart - let's make a new partition
primary - basic normal partition type
linux-swap(V1) - specifies this is a swap partition
320 - size to notate the start of the partition
100% - fill the rest of the disk available space and end the partition
Followed by a print shows our new table with overall space increase to fill the disk. We also get a nice reminder to update fstab.
new partition tree
final steps#
swap#
Now that we updated our disk partitions we still need to tell the file systems that their foundation changed. Starting with swap we need to make a viable swap space.
mkswap </dev/deviceN>
Along with formatting the space this will generate an UUID in which reference the partition. We can find this UUID with blkid.

new uuid
Finally, let’s update /etc/fstab with our new swap UUID so that it will mount the partition on boot.
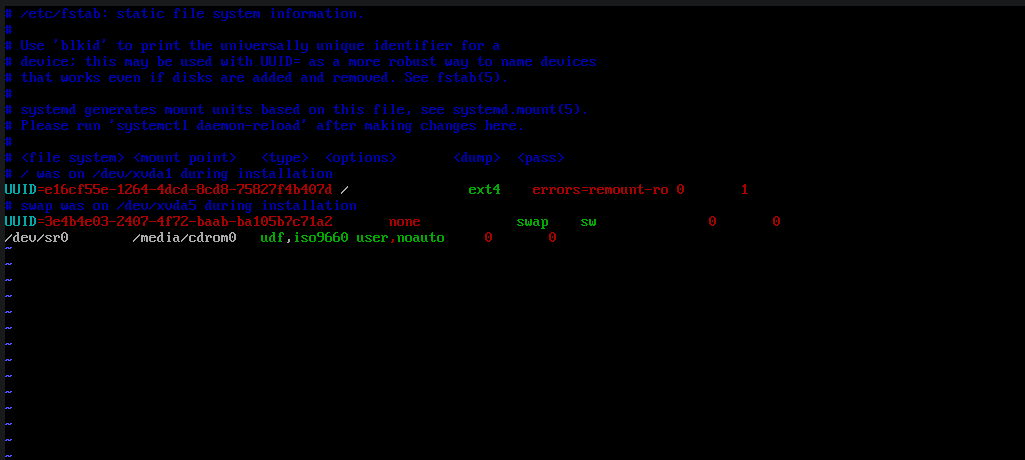
update fstab
resize root#
Let’s boot! …annnnddd It’s alive!
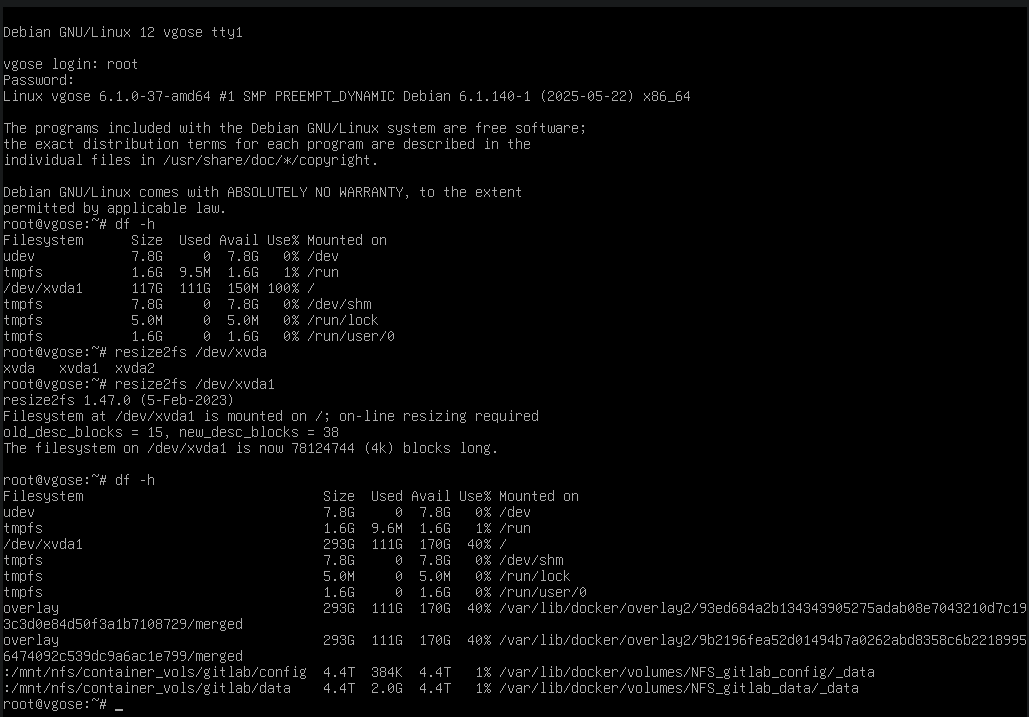
In this final set after booting we run a df and see that our root filesystem still need to expand to this new size. Thankfully ext4 provides us resize2fs to handle this. Running a df again shows we have fully grown to our underlying partition size!
Note: you can run resize2fs while in the ISO.
fin
tl;dr#
- Boot from an iso or recovery mode if available
- Start parted
- Remove non-essential partitions with rm
- Use resizepart to resize partition
- Format or extend filesystems for adjusted partitions
- Cross your fingers and boot!